The Welsh Government Campaign
A few years ago we created an advertisement for the Welsh Government to highlight domestic violence against men.
Part of the concept we created was animating a flat, two dimensional childlike drawing -
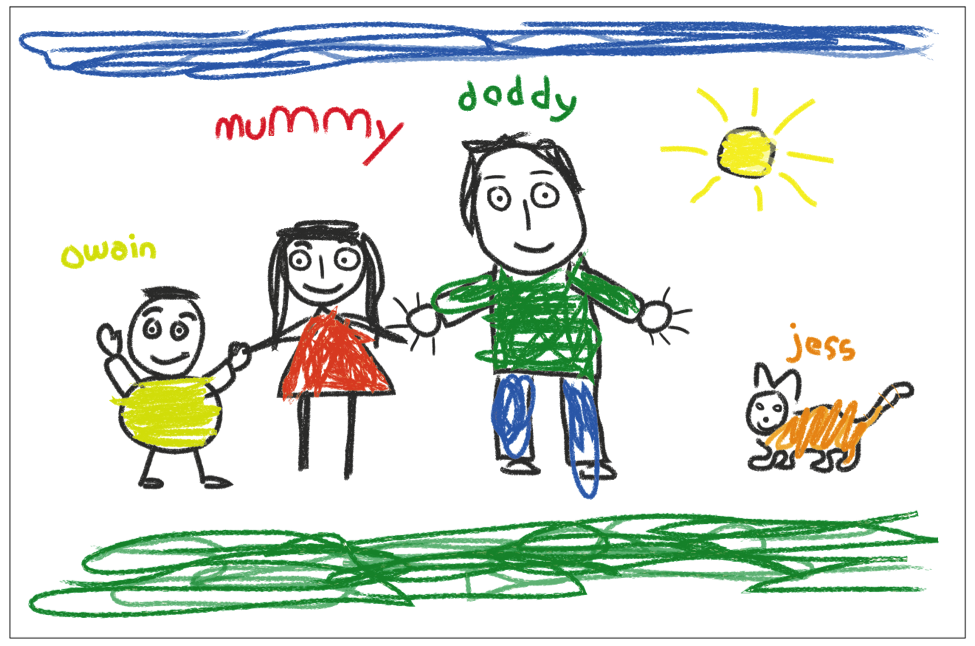
I decided to use Maxon’s Cinema 4D’s ’Sketch & Toon’, which is a super powerful module within C4D. It’s possible to create practically any drawing style, just lines or lines with shading on 3D models to give them a drawn effect.
We wanted the drawing to retain its character - so the last thing we wanted was an artificial 3D render.
What is Sketch and Toon?
Sketch and Toon is a rendering effect. It’s something that’s applied at the time of rendering - it doesn’t work like usual materials or textures - because of this there are a few issues you need to be aware of.
POTENTIAL PROBLEM 1 - Resolution
You could set up a scene, get everything looking just how you want, and then you’re told you need to render a still for print and need it at a much higher resolution.
You do your high resolution render and - all of a sudden - it doesn’t look anything like you intended; the line thickness has gone either too thick or too thin.
This can be easily fixed by going to your render settings.
Note: The option ’Sketch & Toon’ only appears in the render settings once you have created a sketch material. Make sure the ‘Resolution Independent’ box is checked and choose your custom render resolution.
The amazingly talented Chris Schmidt from Greyscale Gorilla talks about this in the first of his excellent Sketch and Toon tutorials.
I highly recommend you watch all of those, there’s so much you can do with Sketch and Toon and Chris delves very deeply into it:
POTENTIAL PROBLEM 2 - Line thickness misbehaving
The other more frustrating issue affecting line thickness is how it won’t change depending on how close or further away from the object you are.
Let me show you an example.
This is a cube with a sketch material applied. I’ve set the line thickness to 32. When I move the camera closer to the cube and render again the line is still the same thickness.
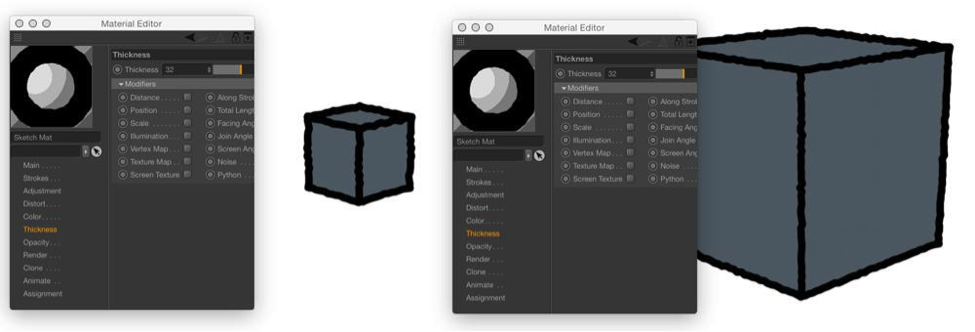
You could animate the thickness value, but in a complex animation with hundreds of different objects using multiple sketch shaders it’s just not practical or reliably accurate.
I only discovered this problem once I’d already started and was horrified to see how it affected my animation:
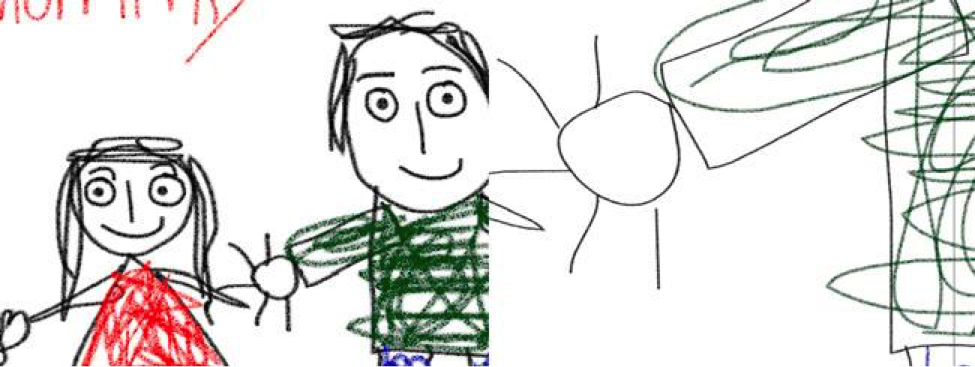
After much head scratching, googling (and coming up empty handed) and then panicking, I came up with my own solution.
How to fix line thickness problems in Cinema 4D
Cinema 4D has a built in scripting module called XPresso.
It’s very powerful, exceedingly complex, and not really something you want to mess with unless you know what you’re doing. Fortunately for me, this problem can be solved using the simplest bit of XPresso.
- Look in Cinema 4D and you’ll find ‘Set Driver, Set Driven’ function.
- In the Object Manager, select your camera.
- In the Attribute Manager select the object tab.
- Right click on ‘Focal Length’
- On the pop up select ‘Xpressions/Set Driver’.
- Go to the Render Settings/Sketch and Toon.
- Right click on ‘Thickness Scale’ and select ‘Set Driven (Absolute)’
NOTE: Doing this will add a null object in the Object manager with an XPresso tag applied. You can double click the XPresso tag and open up the XPresso Editor just like normal when you apply an XPresso tag to any object.
Inside the editor you can see the nodes and the very simple expression.
It takes the focal length value as input into a range mapper which uses the value as a percentage to input into the Sketch and Toon Thickness scale in the Render Settings.
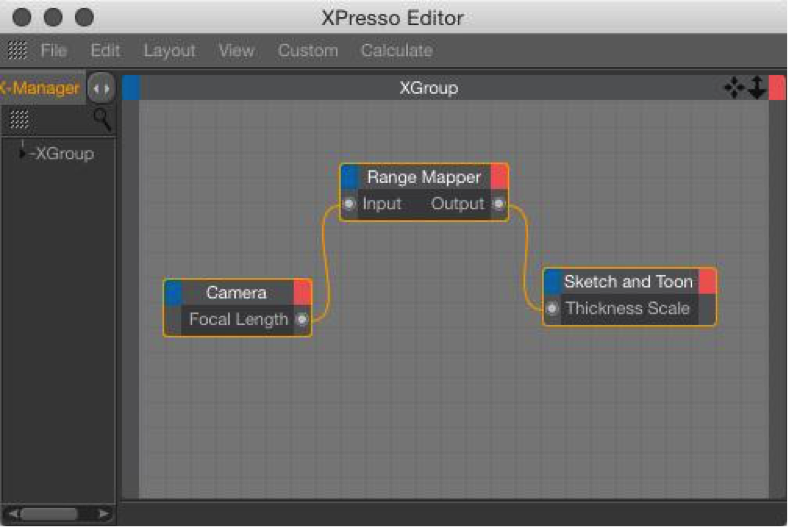
Now, instead of moving the camera closer to the object, control the scale of your scene by animating the focal length in the camera. The line thickness will now scale accordingly.
NOTE: You should still set up your scene first and get your sketch material line thickness looking how you want it from your starting viewpoint, as the line thickness specified in the Sketch Material doesn’t scale, it’s a global thickness scale in the Render Settings.
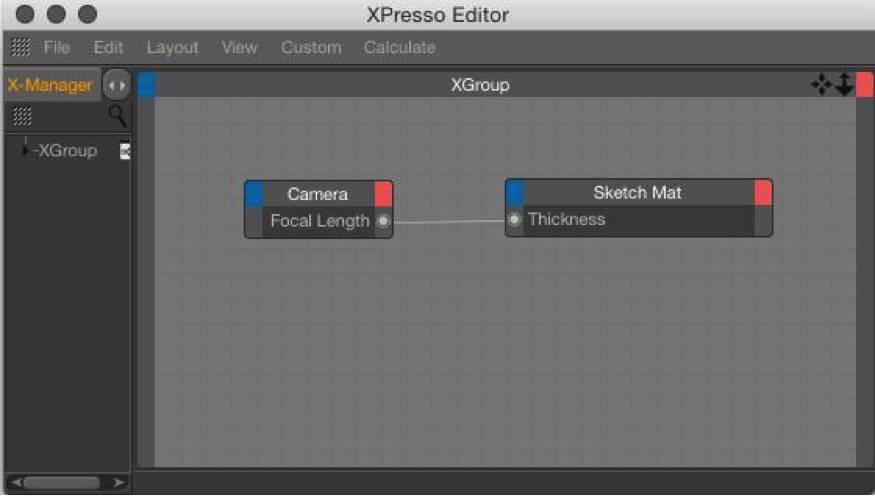
If you don’t want even scaling throughout the scene, and only want it to effect certain materials, you could use this method to control each Sketch Material line thickness by setting the driven to the Sketch Material Thickness, but you have to remove the range mapper node otherwise it just doesn’t work.
Discover for yourself
The potential of Cinema 4D is practically limitless - so play around on it and discover its functions for yourself. As there was little help online about this problem I hope this article has helped if you encounter the same problems.
If you’ve got any other questions on this subject do feel free to get in touch with me - [email protected].
The finished article